Cell Selection Overlays
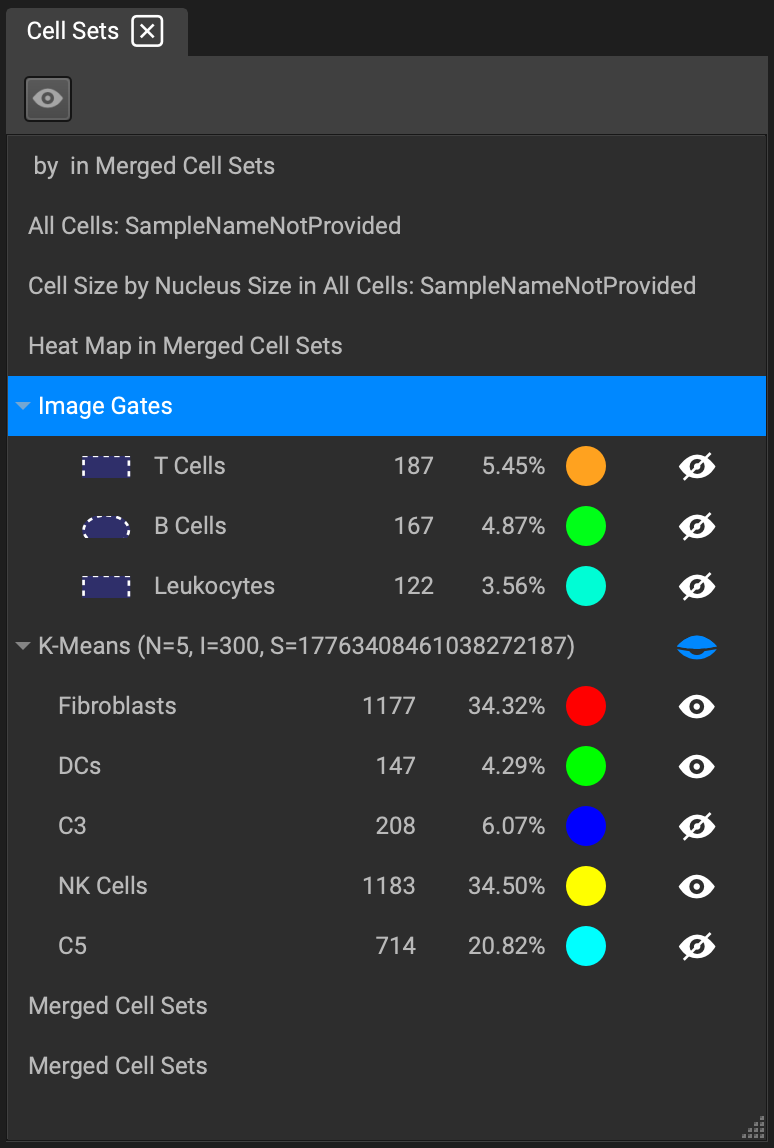
Any gating applied directly to an image, or on the feature plot, will appear in the Cell Selection Overlays window. Cluster files imported into the software will also be displayed here.

Clusters contain a ▼ next to the name of the cluster, allowing the user to individually select which group of cells within the cluster to display. The number of cells belonging to a cluster group, and the group's percentage of the whole image, is listed to the right of the cluster group.

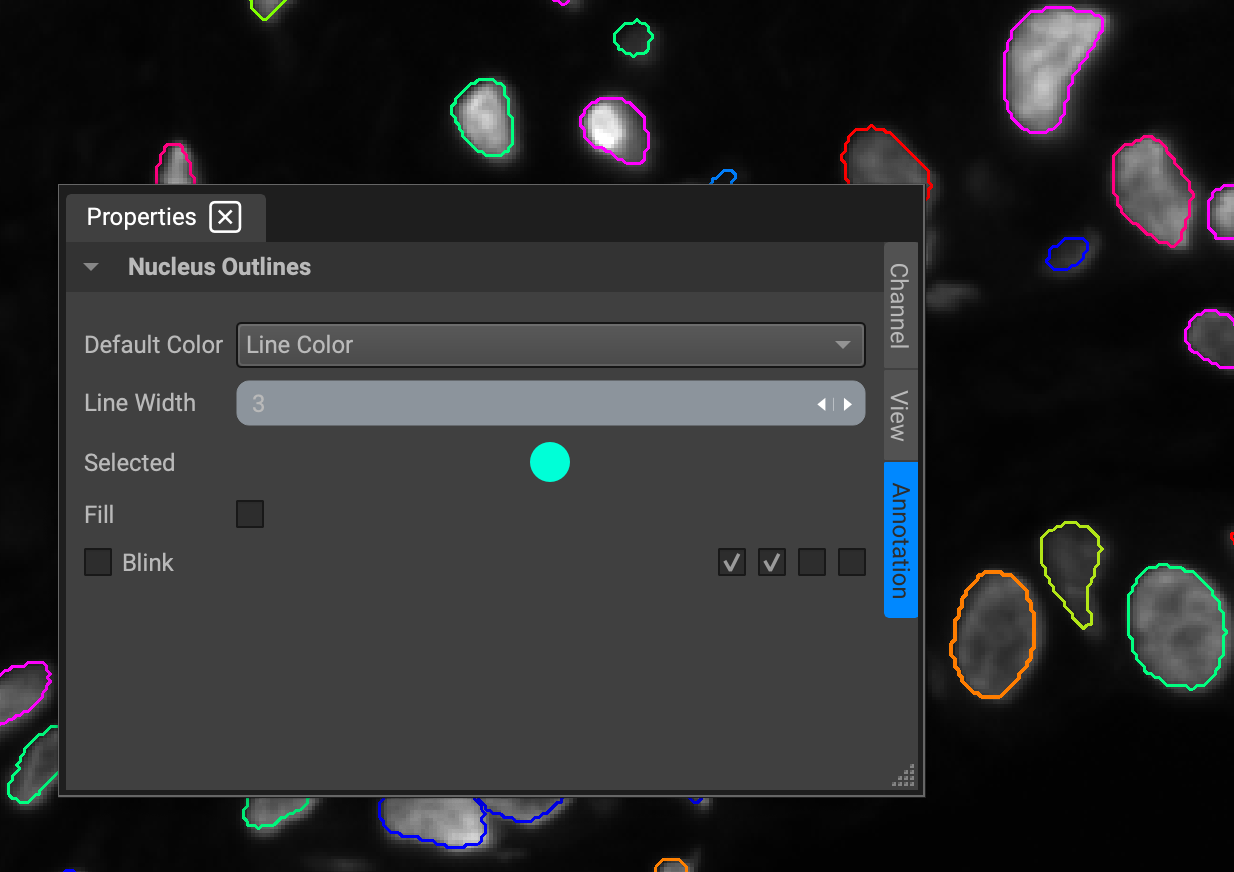
The ability to change the color of the outline of clustered cells can be done by clicking the colored circle, which will prompt a color palette. To adjust the width of the cluster outline, simply select the group of clustered cells within the dropdown menu, navigate to the properties panel, and change the input value for width under the Annotations tab.
Importing Cluster Files

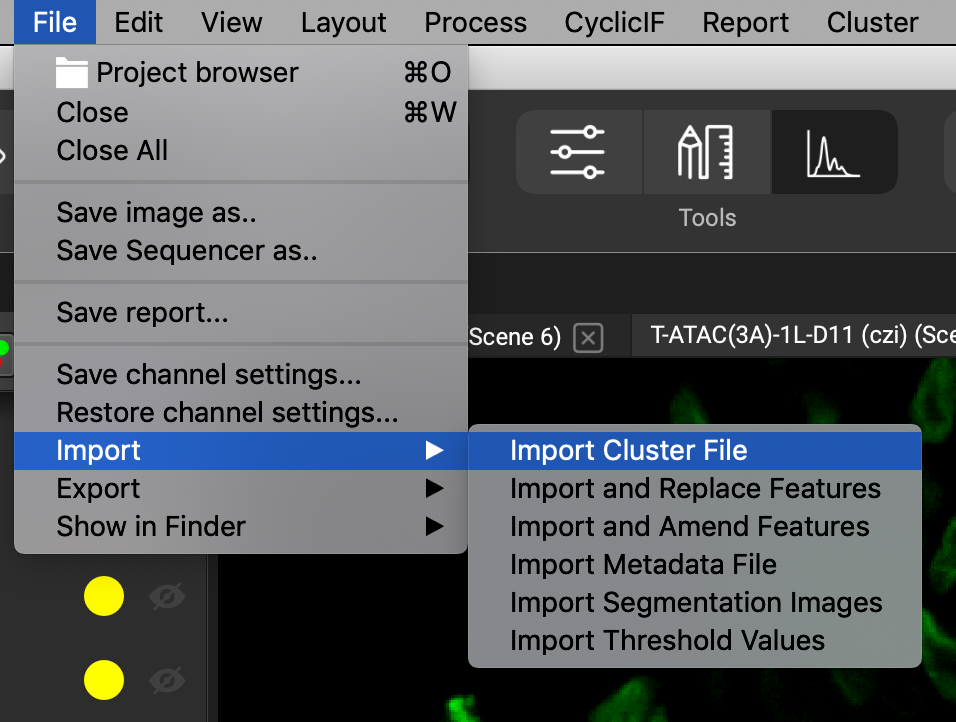
Importing cluster files can be done in the file menu by selecting File➜Import➜Import Cluster File.
You can pick any file on your file system, or for automated workflows, you can take advantage of the "import" folder that QiTissue creates and recognizes automatically. QiTissue will search for the cluster file within the import folder, located within its respective QiData dataset folder. The QiData dataset folder is automatically created when a dataset is initially opened.
To create an import folder, or to locate it if it's already been created, go to File➜Show in File Browser➜Import Folder. Right-clicking the dataset in the Project Browser will also open the import folder if already created.
At this point, you can browse to anywhere in your file system.
Cluster Import File Format
You will need to create a cluster file in a .CSV file that contains certain column headers and syntax.
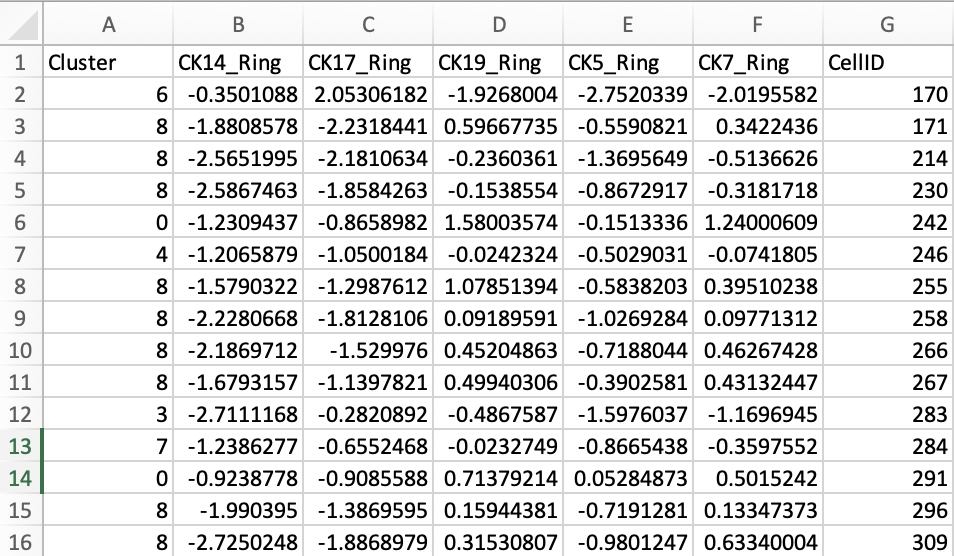
At a minimum, it will need a column with cell IDs and a column with cluster values:
A column within the file must contain the header "CellID" which will have the cell ID information starting with 1 (for cell #1). This allows the cells to be listed in any order in the file, and it also allows for missing cell IDs that did not get assigned to cluster.
Another column in the file must contain the header "Cluster", and contain the cluster value matching the Cell ID on each row. The cluster value can be presented as just a number (starting at 1, cluster ID 0 does not exist). Because some programs generate cluster tables as C1, C2, etc., we also support that.

Detecting column headers is not case-sensitive.
The order of the columns is not important.
The import is resilient to extra columns being in the same file. However, make sure that there is no conflict when other headers use the words "ID" or "cluster" or "label".
Additional Syntax
For particular customer projects there have been some additions to this standard:
You can call the "cluster" column header "label" instead.
You can just label the "cellID" column to "ID".
You can combine multiple datasets (scenes) into one .CSV file and then pick out the specific one during import by using a special "UNIQID" syntax. This must be assigned to a column with the header "UNIQID". The syntax for the content of that column would then require "_scene#_cell#".
An example input under the "UNIQID" column is as follows: Tissue_scene001_cell00982.


