Segmentation
Equipped with a variety of specialized image analysis methods, QiTissue can obtain ultra-high quality content analysis particular to an experiment, using much more than just histogram intensity-based models.

The Segmentation window is filled with customizable parameters that can help direct the automatic segmentation. Choose which cell architecture to include in the segmentation (nucleus and cytoplasm), by checking the "Active" box. For nuclei, selecting this is the first key step. Clicking Autoselect Biomarkers will help select additional biomarkers that can aid in the segmentation.
*Note: QiTissue undergoes constant patchwork, including advancements to existing segmentation algorithms, as well as the development of new methods; Refer back to this page periodically.
Parameters for Nuclear Segmentation
QiTissue provides a multitude of segmentation algorithms, each with a varying number and character of parameter settings. Ideally, the solution is an algorithm that is fully automatic without the need for adjusting any parameters at all. As you select more advanced algorithms, you will see that they have fewer parameters. If any are left, they should be much more resilient to change because the algorithm is better at the automatic adaptations. For classic segmentation methods, there are typically two situations that would evoke the user’s desire to change a parameter:
The segmentation result picks up too few nuclei, and it would preferably be more sensitive to dim or low contrast nuclei. Conversely, the algorithm may be too sensitive and picks up too many cells. In these cases, we would like to adjust the “Detection Sensitivity” of the approach. Increasing the detection sensitivity will pick up more dim or low contrast nuclei.
The segmentation result has under-segmented by lumping nuclei together and needs to be forceful in separating them. Conversely, the algorithm may have over-segmented and cut nuclei in two where it should not. In these cases, we would like to adjust the “Separation Force” of the approach. Increasing the separation force will segment more aggressively.
QiTissue provides a control for both types of adjustments with convenient settings that are automatically centered to “100%” for any given image and algorithm. The user can then simply increase, or decrease, those settings without having to learn all the obscure parameters inside of each algorithm. For example, the desire to be “50% more sensitive” is automatically translated for each algorithm into adjustments in the various internal parameters, and the “100%” nominal value is automatically adapted to the intensities of the image at hand.
Fine-Tuning Your Parameters
Settings that pick up on exceptionally dim cells are the default. Parameters that you adjust hints to the algorithm to be more or less sensitive to the contrast between the object and the background.
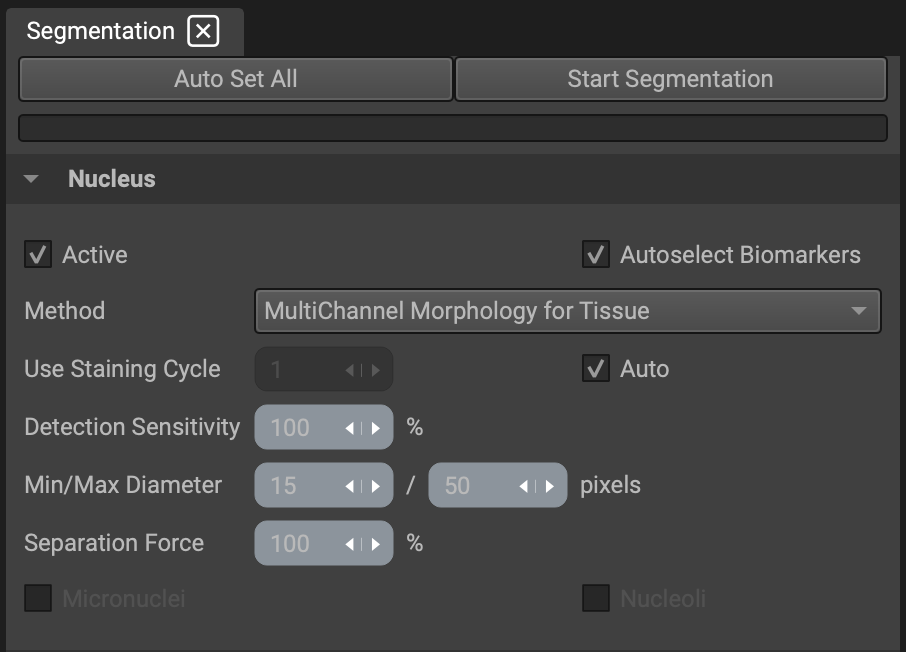
For best practice, start with the default of 100% and check the result of a test run. Adjust the sensitivity if you see very dim cells not picked up by the algorithm, or conversely reduce sensitivity if you see too many cells. Typical values are between 50%-150%, and most likely the 100% default will automatically be tuned to an optimal choice for the image. (Notice that it is not a fixed parameter like a threshold value, but rather a hint to the algorithm to choose a variety of internal parameters to accomplish sensitivity.)
The reason for this approach is that you can set sensitivity preferences independent of the actual image brightness, and independent of the algorithmic method that you’re choosing, so you don’t have to know the details of the algorithm. It offers you the convenience of setting your personal preference of sensitivity for picking up cells without requiring the knowledge of each specific set parameters for each algorithm.
Auto Set All will automatically pick the best method after scouting metadata and image content for clues.
Segmentation Methods
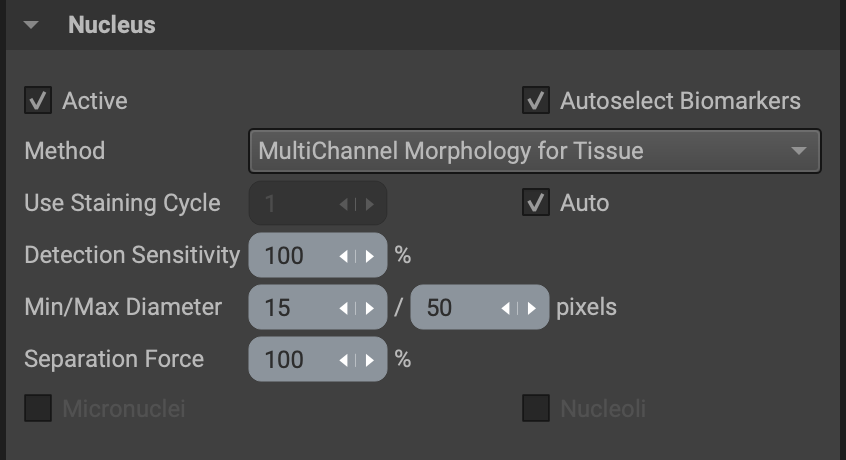
FOR NUCLEAR DETECTION AND SEGMENTATION:
Method: Here you reference the general type of algorithm run to use. The following are descriptions for each method for nuclear segmentation:
Classic Morphology for Single Cells: A fast method based on classic mathematical morphology operators. Fast, but not very successful for complex images.
Advanced Morphology for Tissue: A more advanced method using watershed and structure tensors in addition to classical morphology.
Multichannel Advanced Morphology for Tissue: Similar to "Advanced Morphology" but takes advantage of multiple image channels.
Import Mask: Load a mask image (binary), generated by another program.
Import Labeled Image: Load a labeled image (object indexed), generated by another program.
Staining Cycle: Here you can indicate which nuclear cycle you would like to use for segmentation. Selecting Auto will have QiTissue automatically detect which cycle is best to find nuclei in (normally cycle 1). If you would to change it, deselect the checkbox and use the white arrows, or type in the input box, to indicate which cycle you prefer.
Min/Max Diameter: If a cell nucleus is very clear, QiTissue will determine its diameter without your input. However, if it is difficult to determine the boundaries because of crowding and clumping, QiTissue will stay within the diameter range (in pixels) that you input. Since problem cells are often of the same type, and therefore the same size, a very narrow diameter range can be helpful.
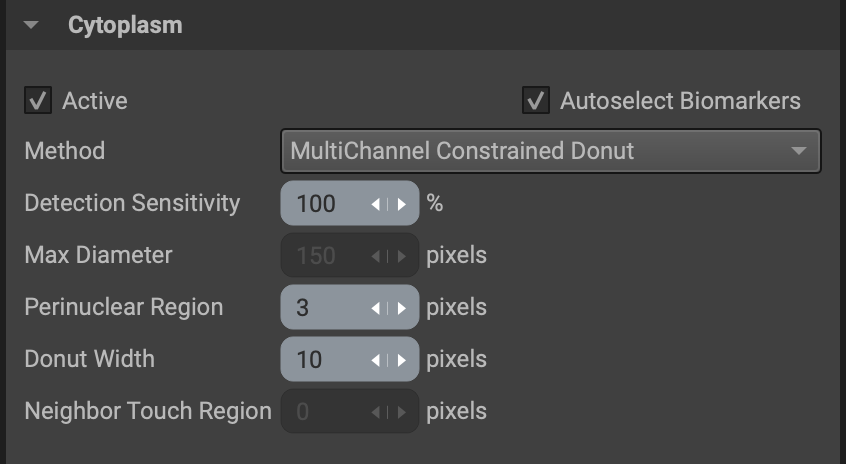
For cell cytoplasm detection and segmentation:
Method: Here you reference the general type of algorithm run to use. The following are descriptions for each method for cytoplasm segmentation:
Donut: A fast and simple method that just expands the nucleus by a few pixels, thus creating a "donut shape" ring around each nucleus.
Constrained Donut: Like the Donut method, but will look at cytoplasm based markers to avoid growing the donut out into the background regions.
Multichannel Constrained Donut: Like the Constrained Donut method, but takes further advantage of additional image channels.
Import Mask: Load a mask image (binary), generated by another program.
Import Labeled Image: Load a labeled image (object indexed), generated by another program.
Max Diameter: If a cell cytoplasm is very clear, QiTissue will determine its diameter without your input. However, if it is difficult to determine the cell boundaries because of crowding and clumping, QiTissue will stay below the diameter cap (in pixels) that you input. Since problem cells are often of the same type, and therefore the same size, limiting the diameter can be helpful.
Donut Width: For donut methods, specify the size (thickness). The "donut" is a ring around the nucleus.
Measuring Cell and Image Features
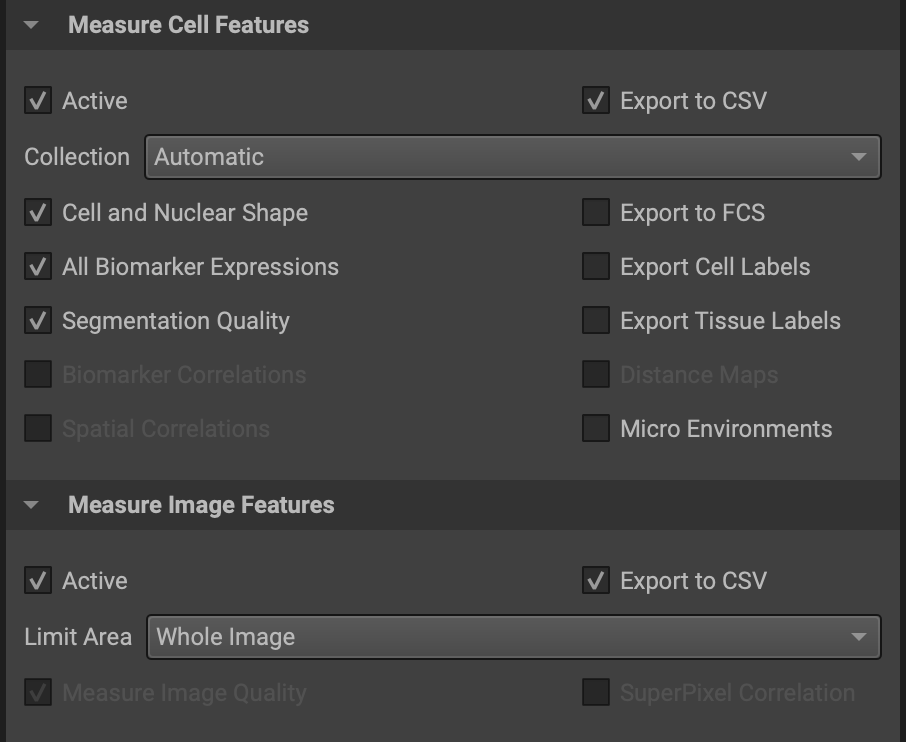
In addition to segmenting cells, you can extract feature measurements in the same window. Select the "Active" checkbox for Cell or Image features before you start the run. (Leaving the boxes unchecked will substantially decrease the computation time.)
Under the "Collection" dropdown menu, selecting "Automatic" will have QiTissue interpret the biomarker channels and compute the most relevant features for them (usually Full Set). Selecting Full Set will automatically calculate all features available in the Feature Table. "Basic Expression Only" will only compute the expression levels for each biomarker channel.
You can automatically export an FSC or CSV text file with all the selected features as a convenience if you find yourself always exporting the data later. You can also export your segmented nuclei and cell masks as labeled images (.tif files).
Checking "Cell and Nuclear Shape" will measure all size, shape, and morphology features of each cell.
Checking "All Biomarker Expressions" will measure all marker expression values using all of the image channels.
Checking "Segmentation Quality" will measure the quality of segmentation and focus for each cell.
Segmenting Regions of Interest
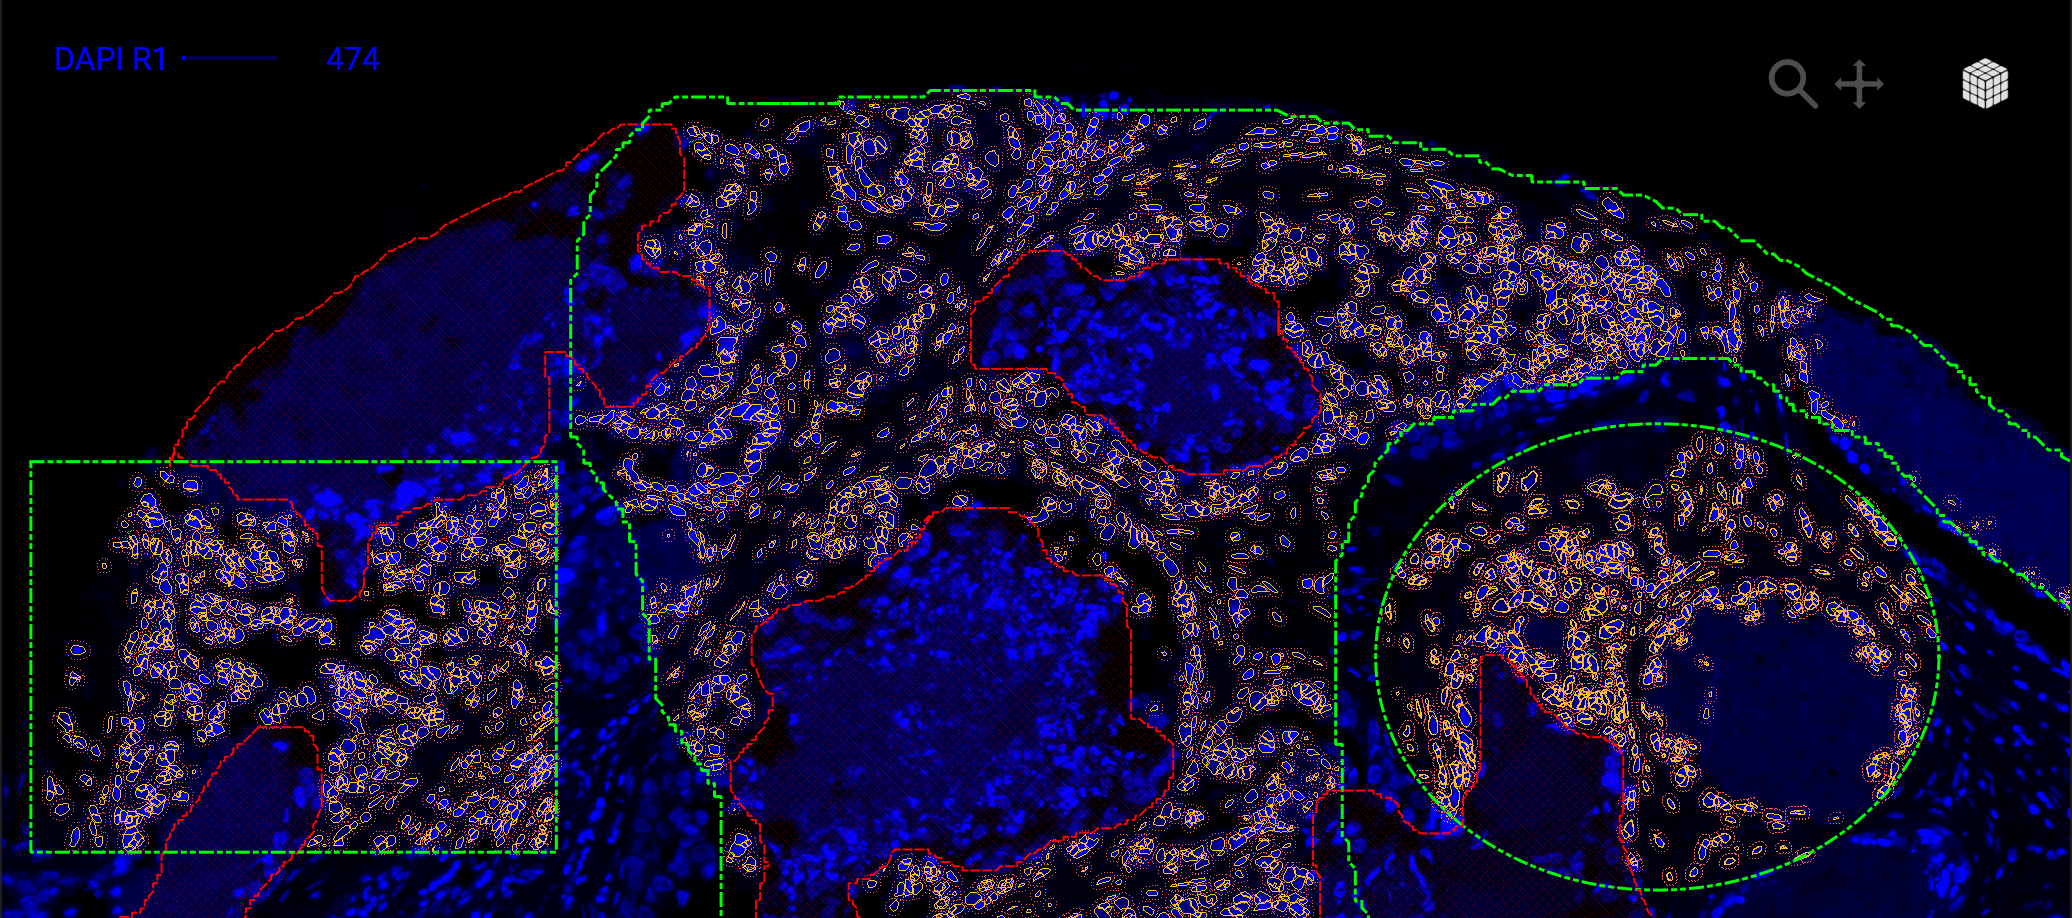
Make sure "All Regions of Interest" is selected from the dropdown list. If instead, you would like to segment just one specific ROI, you can indicate which one in the dropdown list (ie. Region 1 Only, Region 2 Only, etc.).
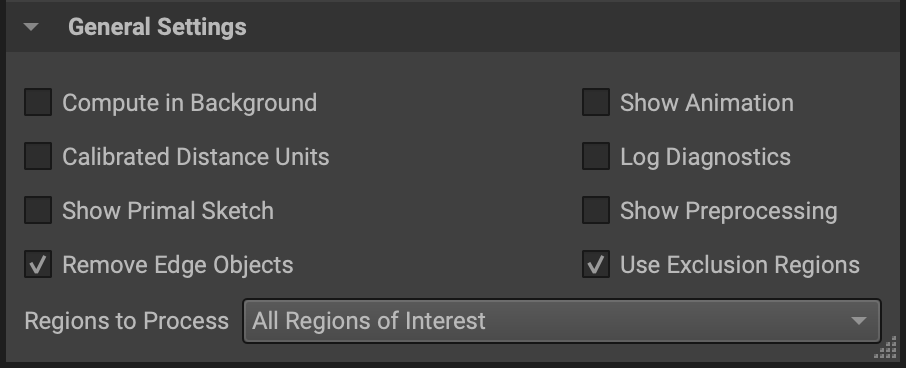
Checking "Remove Edge Objects" will ensure any cells that touch the edge of the ROI are not included, as their measurements will be incorrect.
Checking "Use Exclusion Regions" will exclude any regions marked as "Exclusion Regions", which can be set in the Role dropdown menu for Annotations in the Properties Panel.
Importing Segmentation Masks
If you would like to import a segmentation mask from a program outside of QiTissue, the user must first import the mask(s) through the segmentation widget. The mask files can optionally be placed within the import folder, but you will have the option to point to any directory containing the mask files when prompted. Make sure the following configurations are selected in order to execute the import function properly:
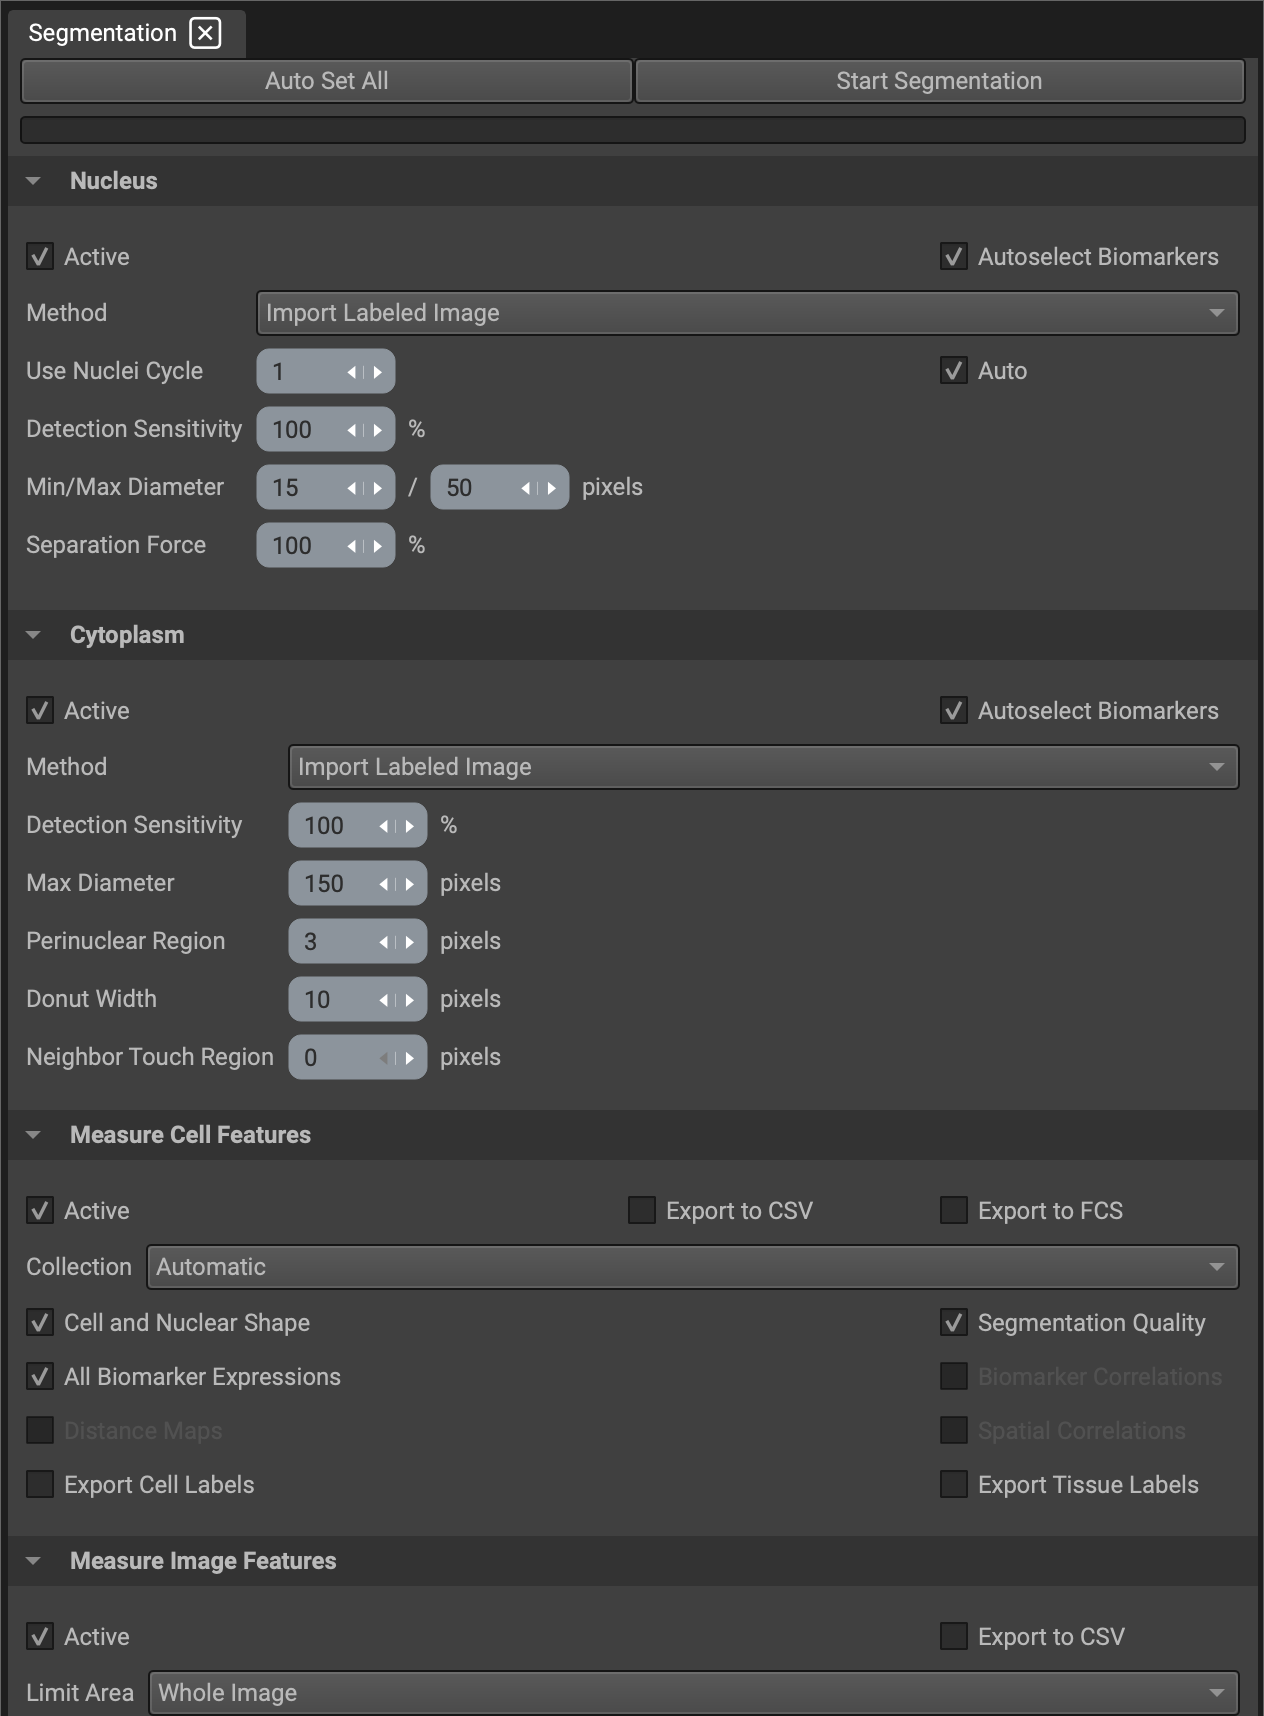
Selecting Import Labeled Image or Import Mask Image will search for the segmentation overlay(s) inside of the import folder by default, but you can navigate to anywhere in your directory. If the overlay has labeled objects (indexed), select Labeled Image. If the image is simply a binary mask, select Mask Image.
Make sure the active boxes under Nucleus and Cytoplasm are checked, allowing QiTissue to begin the import function for the respective cell or nuclei labeled images when "Start Segmentation" is clicked.
Check the active boxes under Measure Cell Features and Measure Image Features for QiTissue to extract feature data from the segmentation mask. This step is necessary to load any cluster files, as QiTissue is unable to load them if there is no feature data to link to the cluster groups and Cell IDs. An error message will appear in the Progress Log window if this is not done properly.
The General Settings section in the window can be ignored for this purpose.
Once the segmentation files have successfully been imported, the user can then upload cluster files by navigating to File➜Import➜Import Cluster File.

